Yurt living is a popular and affordable way to live but you’ll want to consider the pros and cons of living in this type of structure before taking the leap.
Yurts are relatively easy to construct with their simple design of a circular tent-like structure with lattice walls and a dome skylight. Yurts can be scaled to any size and can range from a very simple structure to luxurious depending on your lifestyle and budget.
If you are looking to build a yurt, you’ll need some basic carpentry skills and maybe a few good friends. If you dont’ have skills, plan to hire some help. The easiest way to erect a yurt is using one of these yurt kits that provide all the materials and custom options you’ll need for your yurt.
Wood vs Fabric
If you are using a yurt kit, you’ll want to choose between wood and fabric walls. A few yurt companies such as Freedom Yurts construct walls of solid wood instead of fabric.
Fabric yurts are ideal for erecting a temporary or semi-permanent structure. Three people can assemble a fabric yurt within a day or two. They can be easily dismantled and moved. Fabric yurts are also more budget-friendly although costs will depend on customization such as insulation, door and window selections, and the foundation.
Wooden yurts kits take longer to build but they come with prefab panels. You can expect the following from a wooden yurt kit: walls, windows, roof fabric, snow and wind kit, wall insulation, and more. You might choose a wooden yurt kit if you’re looking to build a permanent home and want the feeling of a yurt with the security of a modern home.
View this post on Instagram
Whether you’re using a kit or building from the ground up yourself, here are some tips to get you started on your project.
Tools and Materials Needed
- Concrete for footings
- Shovel for landscaping
- Lumber for foundation
- Power drill
- 8-foot ladder
- Rope
- Hammer
- Khana (the slat walls of the yurt), a table saw, carriage screws, washers, wing nuts, and hex nuts.
- A power drill and screwdriver
- Sandpaper or a power sander.
- Door frame, bolts, washers, nuts, or leather and nails for the hinges.
- Nylon belly bands
- Temporary support, a table saw, and nails
- Roof ring (plywood) and drywall screws
- Rope
- S-hooks
- Stakes
Zoning
Check with your local zoning authority before constructing a yurt to see what permits are required. Depending on the location and your plan, yurts may be considered temporary, semi-permanent or permanent.
Build A Foundation
You’ll need to prepare a strong foundation for the yurt before building it. The foundation size will be determined by the circumference of your yurt and could range from 12 to 40 feet.
The yurt should have a robust footing and obviously needs to be on a flat surface. If available, a flat section of the earth is the simplest way to erect a yurt. Ensure the ground is level with a landscaping shovel (or rent an excavator if the ground needs more work).
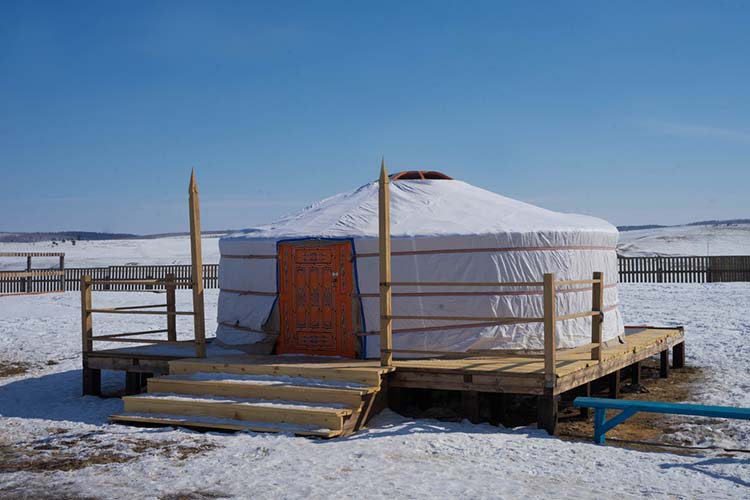
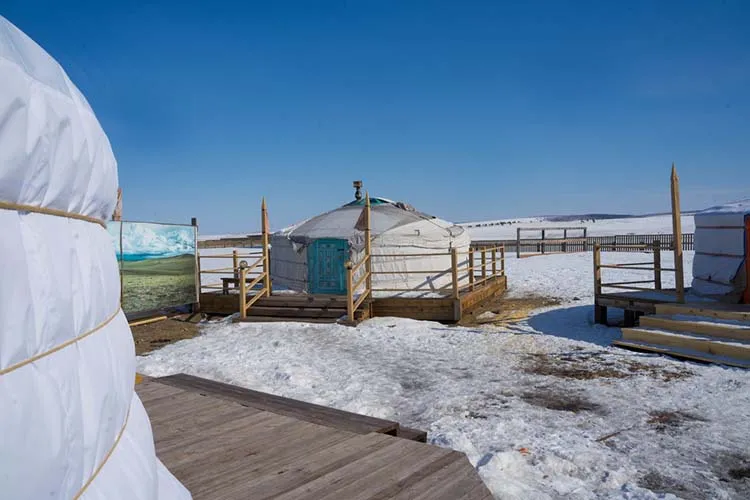
But if you are planning on a longer-term situation for the yurt, you’ll most likely want to build on a raised wooden platform. This is what most builders opt for as it gives the yurt solid attachments around its circumference and will prevent water from rain and snowmelt from collecting underneath your yurt.
Depending on the size of the yurt, your wooden platform might require concrete footings. Again, check with local building codes on permits particularly if you are building a solid foundation.
Lattice Wall & Door Frame
Once you’ve established a solid foundation, you’ll need to decide on the location of the front door. If you are building a platform or deck, the door will most likely be centered at the top of the steps. If you are using a yurt kit, it will include a door and frame. Your task is to use the hardware to attach the door frame to the base.
After you’ve secured the door frame, you should now spread the lattice wall around the foundation. Begin from one side of the door. Fasten one corner of the lattice wall to the door frame and then straighten the lattice wall along the outer edge.
Once you get to the other part of the door frame, anchor the lattice wall with its materials. The kit also includes a wire cable to strengthen the lattice wall at the top. Use the metal straps to secure the wall, too.
A lattice wall may have two separate pieces for large yurts. As a result, you should join the parts before extending the lattice wall.
View this post on Instagram
Build the Roof
The next step involves building your roof and you’ll want some good friends or help to install it as it requires several people. Your roof has rafters that rest on the lattice walls, including a central compression ring to secure all the beams. One person should be in the center of the yurt to balance the compression ring. Meanwhile, the other team members are attaching each rafter to the compression ring on the ground.
Wrap the Yurt
Bravo! You’ve put up your roof and are now ready to cover it. Your cover could be vinyl or canvas and may come folded. You may also use a reflective thermal layer to improve heating if you live in freezing climates.
Your building team is still on the ground. Stand on the ladder in the middle of the yurt and let the roof cover spread out down the wall. Your helpers can unfold the roof halfway to cover 50% of the yurt. Pull the covering to the midpoint of the roof with a rope fastened to the tip of the folded layer. Throw the cord to one of the guys on the ground and ask them to pull it to cover the whole frame. Make sure everything is in its correct position.
The next step in this process is installing the wall equipment. It has several pieces that you need to set up one at a time. You can start from any side of the yurt to put up your wall. To stop water from seeping through the roof, ensure that the wall material stays below the roof’s overhang.
Kudos to your accomplished mission!